
![]()
Search the Journey to Forever website – click HERE
|
Journey to Forever: Make a donation |
Navigation
Contact usTo Keith Addison Handmade Projects |
Backpack stove
Home Made -- Lightweight Backpack Stove
Here's how to make a camping stove for your backpack that weighs just about nothing and takes up hardly any space.
These little stoves are great -- they're fun to make and it only takes a few minutes. Not just a toy -- they really work! They put out a hot ring of blue flame like a gas stove and hold enough fuel for about 15 minutes -- so if you're cooking something that takes longer than that, better make two so you can alternate them to keep up the heat.
All you need is a couple of aluminium soft-drink cans, some perlite, a wire coat-hanger and a bottle of denatured alcohol (spirits, usually dyed purple).
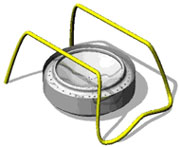
Invented by: Unknown.
Construction directions by: LaMar Kirby -- Utah Lake District, Orem Ut., US
What you'll need
Parts List
- 2 Aluminum soda cans (soft-drink cans or beercans)
- 1/4 cup of perlite (found in the gardening department)
- Wire coat hanger
- De-natured alcohol (found in the paint dept. or boating supply)
Tools
- Scissors
- Drill
- 1/16" (2 mm) drill bit
- Wire cutters
Step 1

For the base, neatly cut one can about 1-1/2" (3.5cm) from the bottom. For the top, cut the other can about 1" (2.5cm) from the bottom.
Step 2
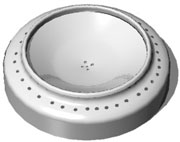
Drill a number of holes (18-30) around the edge of the top and in the center as shown; use a 1/16" drill bit.
Step 3
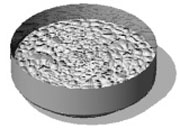
Fill the base with perlite, just more than half full.
Step 4
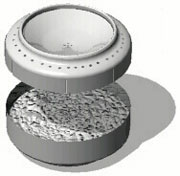
Make 6-8 vertical cuts around the top. Make the cuts up to but not over the rounded edge. Slowly press the top into the bottom. (A small board can help make it even.)
Step 5
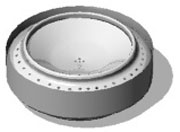
Fill the stove about half full of alcohol. Light the burner by slowly moving a match or lighter over the edge of the burner. Note: If it does not stay lit, tip the burner up to leak some fuel into the rim and relight. Hold it until it stays lit or gets too hot.
Step 6

Cut and straighten a coat hanger. Use fine sandpaper to remove any paint or coating. Bend the coat hanger wire (or any large gauge wire) into a shape that will hold a pot a few inches above the burner (see the example). Note: with a little imagination you can create a number of stove bases.
That's it!
If you have any experiences that will improve this design please let me know.
Email:glkirby@usa.net
© Copyright G.LaMar Kirby, Utah 1996
Scott Henderson's Pepsi Stove
http://wings.interfree.it/html/Pepsi.html
The Home Made Stove Archives
http://wings.interfree.it/index.html
SuperShioshio lives in Yokohama in Japan, he's a mountaineer and he collects backpack camping stoves. "I seem to be attacked by stoves," he says -- he has more than 200 of them, stoves of every possible type, all on display at his website.
http://www.asahi-net.or.jp/~we2a-sod/index.htm
See also Hobostove, TrailStove, Volcano kettle